Friday, December 7, 2012

Doe a deer, a reindeer -- gender non specific


This deer nearly drove me crazy, but now that it is finished, I love it. It stands on its own, but only if you successfully stuff the legs properly, and then attach them properly on the body. Being a Tilda pattern, the location for the legs is not marked on the body pattern piece. I have no idea why -- not telling us doesn't make it easier to pull something like this off -- just saying. One is largely left to one's own devices.
For me, this means pinning, repinning, pinning again -- and not in the fun Pintrest way. More like in the,"Why won't this flippin' deer stand on its own?" kind of way..
It was too wet today to go and get some cuttings from our shrubs to make antlers, but I will add them when conditions dry out enough.
I have been working on a number of Christmas gifts this week, so I can't post photos. However, once they are given, I will post pictures.
Hope everyone is enjoying these days leading up to Christmas!

Monday, November 26, 2012

It is beginning to look a lot like Christmas...

This is the bit of last year's Christmas tree.
Here is today's festive fun! I decorated the little bit of last year's Christmas tree.
When you have a real tree, you make a fresh cut to the trunk when you get it home, then you put the tree into a bucket of warm water which has tree preservative added to it. It really helps to keep the tree fresh before you wrestle it into the stand.
I used texture mediums to create the ground cover. The mercury glass beads on the large bottle brush tree are from the 1950s. The trees are new from Michaels, as is the little deer. The mushrooms were acquired years ago at a closing out sale of a large gift ware company here in Canada. I have hung on to a little box of 10 mushroom stems for ages. Now, three of them have found a home.
When this is fully dry, it will be displayed in a bell jar.

Sunday, November 25, 2012

Little bitty baby quilt

Rainbow in the clouds quilt
I haven't been to a baby shower for ages!
Well, now that my eldest has entered her mid-20s, the baby showers are back in the picture.
This is a little stroller/carriage sized quilt for a little girl who is due to arrive in early February.
This is small size was perfect for finishing with little details like the hand appliqued clouds and rain drops, the swirly curly cues in the clouds and the outline quilting around the raindrops.
Doing the rainbow sections was a fun trip through my stash. And the sky blue was discovered on a trip to the Keswick ON Fabricland with Sandra. It was perfect and $3 per meter so I got enough for backing as well.
I was really pleased with the way it turned out, and the mamma to be liked it very much.
The idea for the quilt came from the book All Sewn Up by Chloe Owens.
I bought the book for the projects, not the fabrics used. There is an extensive use of "vintage" sheets. Or as I call them, sheets (the ones that I used to sleep under before I myself became vintage.)
Now, maybe I am just a cranky old broad with no sense of style, but every time I see vintage sheets in a project, I am reminded of hanging out four sets of bedding every Saturday morning on our family's clothesline. This had to be done PERFECTLY, with no wrinkles -- and to my mother's satisfaction, using three pegs per sheet -- two pegs either end and one in the middle. She was quite specific about it. I have no idea why. I never did. Frankly, I didn't care. This task was virtually impossible for me to do correctly -- and I wanted to be doing ANYTHING else on a fine, fair Saturday. Every time I see a sheet from the 1970s, it reminds me of the task.
Nope, I much prefer to use the beautiful cottons currently available.
I also wanted to share a photo of a Tilda sewing kit I made for Leanne in Australia. She has also blogged about our swap, and has some lovely images about Spring, which is nice to see in the midst of our impending winter.
This week in vintage shopping, I dropped a donation off at the thrift store.
Well, I was there, wasn't I? Naturally, I had a tour around.
I found some bottle brush Christmas trees (dearly love them) and more old buttons -- love, love, love  old buttons! Once I have sorted them, I will post a shot of the booty.

Tuesday, November 13, 2012

Swapping the love!

Stitching envelope by Leanne
The great thing about stitching, creating and writing about it all is "meeting" up with like-minded folks from all over the world.
Teacup dolly 1
I am very lucky to have the opportunity to chat almost every day with a lot of really lovely people, most of whom I have never actually met, but I am getting to know through our shared love of creating.
Recently, Leanne of Lizzie the Quilter fame, wrote asking if I would like to do a swap focused on our shared love of Tilda by Tone Finnanger.
We mulled over what we could swap, based on the fact that postal rates in Canada and Australia are both insane and -- dare I say -- usurious. We settled on something that was fairly flat, and from any of our favourite Tilda books.
Teacup dolly 2
I settled on the retro-inspired sewing kit from the recent Tilda's Spring Ideas book. Fortunately, it was not only flat, but also lightweight.Leanne sent me a lovely sewing envelope bag which is made from Tilda fabric inside and out. It is so nice to have this lovely bag to stash my stitching projects when I am on the go.
Thank you so much, Leanne! I will think of you doing your stitching on the other end of the world, while I am doing mine here, all because of the pretty envelope bag you made just for me.
In other news, the snow has started to sprinkle down from the heavens here. That can mean only one thing: time for the menfolk to make the ice rink frame
It was ridiculously warm on Sunday, so the boys were out framing the ice palace pad in preparation for the arrival of the giant plastic liner. After that, it's the start of the flooding and the thrill of the freeze.
As for me, I am staying inside, near the sewing machine, to make some little teacup dollies for Christmas gifts. They are but the first in long list of makes. How does Santa do it?
Framing the rink, 2012
Oh yeah, I gotta get me some elves....
Have a wonderful day everyone, and remember to share the love that comes from creating.

Friday, November 2, 2012

In just 147 days... the newest Tilda book!

Oooo, this will be worth the wait!
Look what I just pre-ordered from The Book Depository. Yep, that is the new Tilda book. It is called Fairy Tale Wonderland, but there's a lot of Christmas-y type projects in it.
The fact is that the book has been out in Europe since this past September, but in Norwegian. I can't believe how long it has taken to publish the English version, but then again, I have a feeling the company involved isn't really aware of how global the Tilda fan base has become. It is really the only explanation for delaying the book's English publication until AFTER the Christmas buying and crafting season. But, better late than never!
The book features characters from several well known fairy tales like The Steadfast Tin Soldier and The Princess and the Pea. There are also cute teacup angels, a teapot pincushion, the sweetest little standing deer, and Pinocchio.
The fabrics used in the projects are also new. The palette has a vintage feel, full of soft blues, muted greys and greens.
Even before I saw the book, I ordered a few of the fabrics from my favourite webshop, lovetilda.nl
The site is in Dutch, however, Google Translate is a great resource to help work out how to order. In addition, Rian, the webshop owner, could not be more helpful when it comes to helping her customers find their Tilda heart's desire. Not long ago, she offered some of the scraps she had left over from doing her own Tilda projects. These scrap bags gave me a chance to use a wider range of Tilda fabrics for small projects like covered buttons or the little flowers featured in the Spring Ideas book. And, for reasons I don't completely understand, I just really love scraps. Tilda scraps? What could be better?
Okay, this is going to be a long 147 days...being a Tilda fan involves developing a lot of patience.

Thursday, November 1, 2012

At present, I am working on presents

Lavender berries
I have been making gifts for people lately.
First, I made a jar filled with lavender berries. My daughter completed her first practical teaching assignment, and wanted to give the associate teacher a thank you gift.
She loves these strawberries, and she has commissioned several sets of these over the last few months for gifts. Her teaching associate loved the gift.
These strawberries are filled with some of my lavender and a drop of lavender essential oil. They are sealed in a mason jar, which I converted into a pincushion. The fragrance fills the room when you open the jar.
The tag is an idea acquired from the nana company. I just love this blog and the very sweet ideas presented there.
I even taught myself how to set an eyelet. I was going to brazen it out with a hammer, and the setting tool provided in the package of eyelets, but Michaels had a 50 per cent off coupon in their e-mail coupons last week. I splashed out on an eyelet setting tool, can also be used to set snaps and rhinestones. This is a tool I will be using a lot. I can see me making more of these tags. I loved the look of the whole package once it was put together.
I printed a computer tag and attached it to the back of the tag. I then attached the whole label to the jar with baker's twine.
Cute bug!
The second gift I worked on this week is a present for my dear friend who has a birthday next week. She loves to garden, and I will be putting a flower pot together filled with some treats and this little bug, which is from the book Tilda's Spring Ideas. She was leafing through the book a while bag and said she loved him. I made a mental note, and using some real Tilda fabric from an ebay seller in the UK, I made him for her.
Now that I am in gift mode, I guess the time has come to start cracking on with the Christmas presents. At least, this is what all the incessant television ads tell us.
What are you working on this coming weekend?


Thursday, October 18, 2012

A tutorial not only for the birds...


Sew around the shape

Take your time
The CreativFestival was so much fun, and I enjoyed meeting the many people who stopped by our booth.
There was a lot of interest in how I did the bird applique, so I decided to do a little show and tell tutorial for a cheater way to do needle turn applique. This is a fun way to do applique. The finished result has finished edges and is slightly padded, adding texture to your project.

You will need a scrap of linen, scrap of muslin, thread, a sewing machine, a chopstick, and fine tipped sewing scissors.
Clip notches all around the shape
Cut a cross slit into the muslin
Press the shape
Smooth the seams

Step one: place linen and muslin together, right sides facing each other. Trace your shape onto the fabric. Remember that whatever you trace will be reversed. Shapes can come from anywhere, but chunky ones work best. You and trace around a cardboard template as I did with the bird, or even cookie cutters. (That would be a fun way to do gingerbread people.) Pin the fabric together, within the traced shape.
Step two: sew around the shape using a very fine straight stitch length. Go slowly, and use the hand wheel now and then to go smoothly around the curves. Take your time. If you have a clear embroidery foot for your machine, this step is a lot easier.
Step three: Cut out the shape, leaving a 1/4 inch seam allowance all the way around.
Step four: Clip notches all the way around the shape, taking care not to clip into the stitching.

Step five: cut a cross into the muslin.
Step six: turn the shape through the opening in the muslin. Smooth the seams and ease out the curves using a chop stick or something similar. Roll the seams between your thumb and forefinger. Gently wiggle the seams back and forth to make sure all the clips and curves are smooth and rounded.
Step seven: Press the shape with steam on.
Now, your shape is ready to applique to your project.
Applique by hand:
Place the main fabric in an embroidery hoop and ensure it is drum tight. Pin the applique onto the fabric.
To do the applique, use an applique needle, which is slightly shorter than an regular sewing needle. If you can find it, use a fine silk thread, which tends to resist knotting. It is really nice to work with for many hand sewing projects. It is about $2-$3 more than a spool of polyester blend thread.
Pin your shape to the fabric. Pick up just a bit of the shape's edge and sink the needle into the main fabric, trying not to pull too tightly. Continue stitching, just catching the edges, all the way around the shape.
This technique is so much fun, and it can be used to personalize all kinds of projects. You can also add embroidery, buttons and beads to embellish your work.


Tuesday, October 9, 2012

Fanciful birds take flight at CreativFestival

Here is my surface embellishing project for the CreativFestival.
This coming weekend, on Oct. 13, I will be demonstrating some surface embellishing techniques, including embroidery, adding sequins and beads at the CreativFestival in Toronto.
I have prepared several of these hoops and will be teaching at A Needle Pulling Thread Magazine`s booth at the festival. The idea is that people can put on a few sequins or beads, or a few embroidery stitches and then leave the hoop at the booth. I think I will be cool to see how the birds look at the end of the day.
The CreativFestival is a huge event for Canadian creative types. There are literally hundreds of demonstrations, make and take opportunities, classes in all kinds of creative pursuits from knitting to jewellery making. There are also many, many vendors at in the market area of the Metro Convention Centre in downtown Toronto.
I am looking forward to teaching others what I love to do.
Also, can I help it if I do some shopping along the way? No, of course not!
I will post some photos after the event, provided I get some good ones.
Have a lovely week, everyone!

Friday, September 28, 2012

Sparkling things...

Sparkling Winter Angel
I finished my Tilda Vintage Angel from Sew Pretty Christmas.
I have to say, she was a bit fiddly. However, now that she is finished I am well pleased with her. The actual construction was not that difficult. The details were more challenging. Her hairstyle involved threading a wire through her head, and the winding the doll hair yarn over it. It was hard to keep the wire steady and even -- while adding the yarn.
This time, the stuffing of the figure was not a huge problem. I changed the fabric to Kona cotton in a colour called nutmeg. If you have never used Kona cottons, well, that's a shame. It is sturdy, but at the same time, soft. It also stands up well to the rigors of firmly stuffing the limbs and body. I think I am a convert.
In the book, this angel is holding a Christmas ornament. I want to have the doll out and about all the time, so I didn't want to make it too Christmas specific.
Sparkling Winter Wreath
I decided to create a winter wreath with little paper roses, leaves and a mushroom bird. I added some sparkle texture "snow", a product by Martha Stewart. It is pretty easy to use, and I really like the effect.
Finally, it was time to add the hot fix crystals to her painted shoes, wings and give her some jewellery.
Sparkling glass buttons
While I was waiting for her shoes to dry, I went out to Value Village for a little scouting trip. As ever, I found some wooden embroidery hoops for my upcoming session at The CreativFestival in Toronto (October 12, 13, and 14). As I was loading them into my cart, I spied a bag of buttons. I never pass up a bag of buttons.
When I put it into the cart, I noticed the yellowed tape on the two little bags inside the bigger bag. Yellowing tape could only mean one thing -- old buttons! I love old buttons, especially old glass buttons. I did not do a little happy dance out to the car. That would be weird -- well, in public anyway. Back at home, I did the happy dance. There were so many little treasures in the bags. I think my favourites are the little blue cameos.
Now that the Vintage Angel is finished, I am working on the pieces I will be using at the Festival.
Once again, I will be at A Needle Pulling Thread Magazine's booth on Saturday, October 13.
I will be demonstrating how to do surface embellishment of various kinds. I will be doing a little block, which will include stitching, beads and sequins -- and maybe even feathers.
More on that another day -- soon-ish!

Thursday, September 13, 2012

All kinds of good gifts arrived today

An artful garden gift

While I was at the post office picking up a lovely package from loveTilda in the Netherlands, a lovely neighbour shared some of the harvest from her garden.
Now, lots of people might shove a few tomatoes in a plastic carrier bag, top it off with a couple of squash. And sure, that's a nice thing to do.
But, the lovely Luisa always offers things artfully and tastefully.
This year, the floral arrangement is actually mint and basil with a Blackeyed Susan in a sweet little pear nectar bottle. It's just a beautiful work of art, as well as a thoughtful gift.
I just love it gifts from the heart, given creatively.
The Tilda package features some fabrics from the new line, which is from a book called Tilda's Winter Dreams. The book isn't due out until mid October, but I have heard it is in Norwegian. I have heard nothing about an English version.
However, the colours in this fabric are so pretty, nothing will be lost in translation.
I also ordered some buttons to make a Santa figure in a stylin' jacket. Normally, I just make do with what I have on hand when making things Tilda, but the jacket needed the actual buttons in order for him to be, well, stylin'.
I haven't done much making at all this week. I'm just not keen for whatever reason. I hope this passes soon. If it doesn't, I am going to start feeling stuck.
Unstucking oneself is not so easy, and I keep seeing Christmas count down calendars everywhere now.
This is no time to be getting stuck!


Friday, September 7, 2012

Mabel sewing in the garden

Today, I finished Mabel, the Tilda Sewing Room Angel! Yay! Yay!

Sunday, August 26, 2012

Hello, Dollie! You're lookin' swell...

She needs some hair, and a face
When Tilda's Spring Ideas came out -- well long before the book came out -- I saw the Sewing Room Angel and knew I had to make her.
She has been a work in progress for much of this week. I have worked on her off as I organized the new den. She still doesn't have hair, or a face, but she will at some point this week. Once she is ready for her close up, I will stage a proper photo shoot.
Wallet key ring combo
I also finished my new wallet key ring combo. I began this at Sandra's house a week ago, and only now is it finished. I had some issues with it, read on...
This is a kit with fabric, components and the pattern from Quilt A Bag.
I took three runs at this. The first two times the binding fabric I used did not work with the other fabrics. I am good with colour, and that is usually a blessing when matching threads and picking fabrics for projects, but it is a curse when you get it wrong. It is impossible to continue until I feel it is right.
I made three sets of binding, installed two of them, hated them both, but then the third time was the charm. I have made more of this green polka dot binding just because I think it will go well with other things in the future.
This little wallet project actually required me to install a zipper -- by hand. I did it! I did it wrong the first time -- naturally -- so I had to reverse the zipper to allow easy access to the pockets in the wallet. I love the little apple zipper pull.
I think I have found some presents for my gal pals this Christmas, provided I can get only the components from QAB.
It there is one thing I don't need, it is more fabric.
Or bags, and yet, while I was at Value Village recently, I found a Cath Kidston Crossbody Messenger canvas bag for $3.99!
I was so happy to see it I almost squealed. Okay, I actually did a little squeal. It wasn't a loud squeal, but it was a happy one.
The fabric on the bag features English landmarks and is called Britannia. The bag has an outer pocket and two inner pockets. It is perfect condition, and I am pretty lucky to have found it at any price. At under $5, it is kind of a miracle.

Wednesday, August 22, 2012

Seriously, I would rather move house

All summer long, we had to plan for the big move. The den was to become my daughter's new room because it is a better shape,  providing both a bedroom and office space.
She is in teacher's college this year, and needs to have space to do assignments and other work from her practicum work in schools.
Eventually, it was down to wire. We had to get it done, as she was about to start school.
This project has taken two weeks. TWO WEEKS! And I am not yet finished.
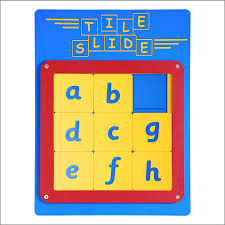
Getting started reminded me of the tile puzzles we used to give the kids to keep them busy on long car trips.
We had to put things all over the house in order to make the moves necessary. Yikes! At one point, I said it would have been easier to move house completely.
I moved my desk and my various storage racks out of the way. The kids moved the bed from one room to the other.
Then, they moved the futon, and I moved the racks.
I bought EZ Slide Moving pads. Amazing product. It was how we got the TV unit out of her new room and into the new den. The whole thing moved down the hall with very little effort. We also used them to move DD's book cases and her desk into her new room. The plan came together in a week. The settling in will take longer.
Along the way, we both decided to "right size" our various collections. DD collection of books were sort of getting out of hand. Ditto several areas of my craft room. Once again, the pickings at Goodwill will be pretty good for a little while for others...
I am now in the process of putting the fabric stash in order by project. The fabric I don't have plans for at the moment will be either filed neatly away, or perhaps even donated to Goodwill. I have to remember that as much as I would like to, I likely won't live forever.
I wish I didn't love fabric quite so much....
Are we a pear?
With all this moving and shaking, I haven't done a great deal of creating, and my room isn't ready for its close up quite yet.
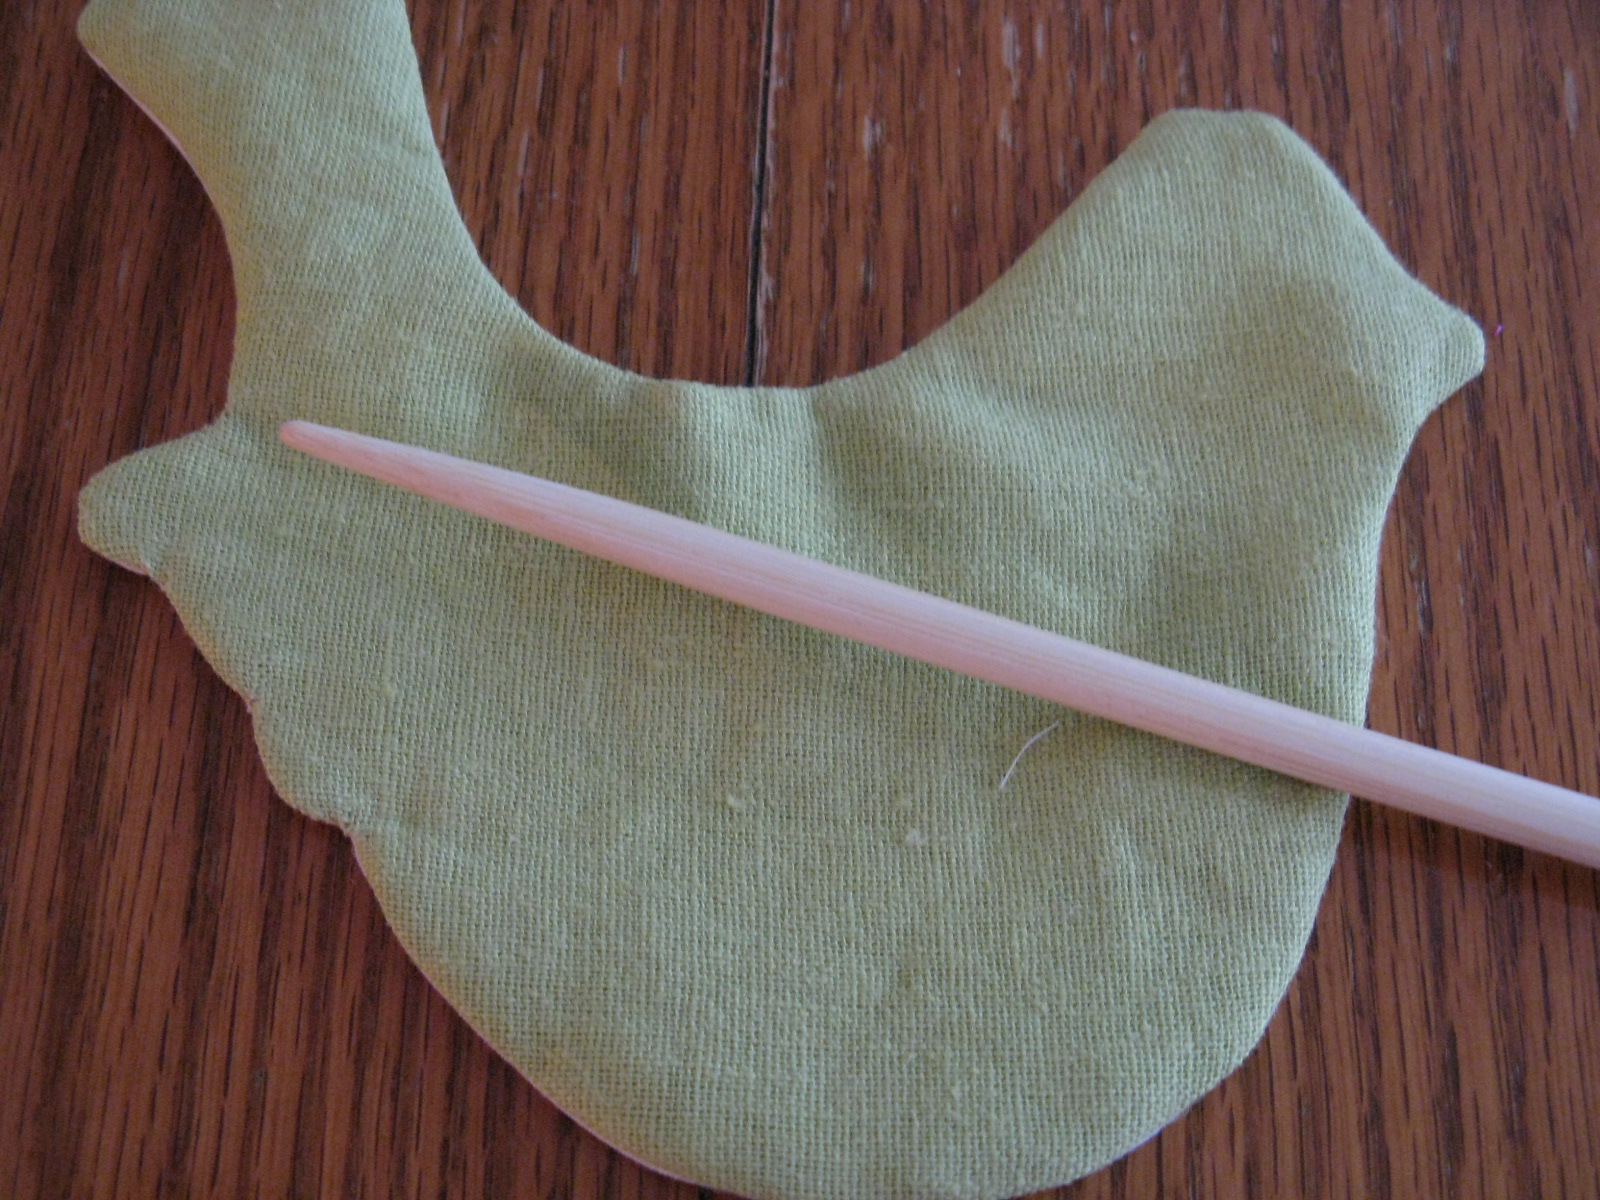
Last Friday, Sandra and Susan and I got together and tried our hand at making some little purses and a wallet. We had a lovely visit, but as usual, I did more unpicking than actual sewing. I hope to finish up my little wallet soon, and I will post the photos. I had a few things going on...
On the weekend,  I made apple and a pear pincushions to give as gifts to my oldest friends. We got together on Monday for lunch.
I have been friends with these girls since we were in kindergarten, and we try to get together at least once a year for our birthdays. I like to make them a little gift each. I just love doing these little fruit pincushions, and they use up scraps.
My friend Mary made some spicy red pepper jelly from the peppers in her garden.
It will be part of an easy appetizer at Thanksgiving this October. Place a brick of cream cheese in the middle of a large platter, and spread the jelly on top of  the cheese, surround it with various kinds of crackers, and step back quickly. People tend to dive toward it...
Well, it's back to the organizing project for me! Send help if you don't hear from me in a couple of weeks...

Saturday, August 11, 2012

Blu-it-ful plummage!

Jellybean, the parrot
Miss B is working as a summer camp activities co-ordinator. This week, it was Pirate Week. Naturally, she had to have a parrot. She kept telling me not to worry about making a parrot, but I KNOW how to make a parrot, and my Tilda's Studio book has a pattern for a cockatiel.
Me being me, I decided to switch a few things up and created Jellybean. She is called Jellybean because of the print on her wings. She is also a Norwegian Blue, the parrot celebrated in the famous Monty Python Dead Parrot Sketch.
My inspiration for the colour scheme came from the line, "Beautiful plummage..." I had to find some fun, colourful fabric for the wings.
Then I remembered a little scrap that I acquired from Sandra.  Covered with jellybeans, her wings were a big hit with Miss B's little campers!
Speaking of fabric acquired from Sandra, look at what she sent to me via a website called Pink Castle Fabrics.
Many Mini Gnomes in Blue
Present from Sandra!
I just love this fabric! I don't even know what I am going to make with it, but it will likely be something for DH birthday this December.
In our family, we have a thing for gnomes.
Each year, we search and search for  a gnome for DH New Year's Eve birthday. I can't remember why we started doing it, but it is one of those family traditions, stridently observed and insanely important. 
One year, we found a little traveling gnome. Thereafter, now and then, the gnome actually travels. There are always photos of his adventures, and they are part of our family photo history.
He's been to London to visit the Queen
This spring, the Gnome mysteriously showed up in London, Paris and parts of Scotland.
He event went to London to visit the Queen!
But, since there is Gnome place like home, the traveling gnome always comes home and sits on the bookshelf, waiting patiently for his next adventure.
The gnome fabric might become just about anything, and it will serve as a reminder of not only how much fun gnomes are, but also of how lucky I am to have such lovely friends.
Thanks, Sandra. You are a peach I tell ya! A peach!

Tuesday, July 31, 2012

Not your average thrifted tea bag!

The parts of the tea towel bag
Sandra, Amanda and I went a thrifting on Friday night. We trolled our usual haunts. Sandra found this old timey Swiss dot muslin bag and admired the frame, but she has some styling purse frames coming her way soon, so she passed the bag and its frame to me. Yay!
I am a great admirer Swiss Dot Muslin, I had several special occasion dresses made from the stuff during my long ago childhood, including one made for my Grade 7 music concert, which was also my Grade 8 graduation dress.
This Swiss dot muslin, however, had seen better days. But, no worries! I had repurposing plans for the bag frame.
It just so happens that I had found a cotton waffle weave tea towel a few weeks ago at Value Village. It was brand new, and by April Cornell, who designs things with bright florals and vibrant colours. I was hanging on to that tea towel until the perfect project came along. I had also scored some plain yellow cotton in the remnant bin last month, so I had all I needed to get started.
The outside

On the weekend, I carefully pulled the old musty bag off the frame. Then, I pulled the bag apart to use the parts to make a paper template. The old bag also had a coin purse attached to a chain, which was clamped onto the sides. I carefully pried it off for use in the new bag.
This is my project for Wendy's repurposing challenge (which closes today, so yay me for actually meeting the deadline).
The inside and the coin purse
The best thing about this project is that I knew exactly how I was going to do it as I went along. A little triming here, a little curve clipping there,  a lot of serious pressing as I went along, and I was finished in under two hours. Yay me!
Now I have to get myself invited to a garden party so I can show off my 50s inspired bag. Or maybe I will just start using it for no reason. Life is short, and tea towel bags don't come along very often!

Monday, July 30, 2012

A dashing new dust cover is finished!

Look, I finished my sewing machine cover!
It features linen, free motion quilting, a Tilda embroidery, ric rac AND gingham bias tape. Those aren't polka dots on that fabric -- they are vintage buttons -- it is from a line by Lakehouse Dry Goods. Those are pink polka dots are on the top.
I made up the design, so I decided to put all my favourite things in one pretty cover. It is much nicer than the hideous vinyl thing that came as a "bonus" with my other machine.
Now Bernie has a lovely coat to wear when we can't be creating together. As we all know, it is important to look pretty, even when you aren't doing anything...
More importantly the new cover it will help protect her from the vast amount of dust she must live with day after day. :-)

Sunday, July 29, 2012

Where has she been????


Dottie and her beach bag
I finally finished this Tilda angel, featured in a magazine in the UK called Tilda's Homemade Ideas. It is the price of a craft book, and for me to order it would be really cost prohibitive. However, I have really nice European friends who shared the instructions with me.
Dottie, as she is known, has not only a floppy hat and 50s inspired bathing suit, she also has a beach tote filled with all her stitching supplies.
All of the Tilda dolls are a challenge to do, but this one was really tricky. The difficulty lies in getting the stuffing done properly, and without lumps. Doing this doll's stuffing took me three tries, and it isn't totally perfect, but eventually, I had to move on.
This doll will be going with me to the fall Creative Festival in Toronto. I will be part of A Needle Pulling Thread's booth, promoting not only the magazine, but also the work of independent needle workers.
I must confess, I have been a bit stuck. Creatively, and otherwise, I have been challenged to keep focused and getting things finished. This happens to me a lot, and I always find it frustrating. However, I have learned to be patient with myself and the finishing will come. I just don't have to like it!
This week, I am also working on finishing my sewing machine cover.
I started it ages ago, but I was busy getting ready for vacation and didn't get it finished. I also have to finish my houses wall hanging.
Oh, and I want to finish my re-purposed project for Wendy's challenge by Tuesday.
Kind of a boring post, sorry. But, I do thank you for reading my to-do list!

Tuesday, July 17, 2012

... and we're back to our regularly scheduled life


Houses awaiting their doors
The vacation was not long enough. It wasn't nearly long enough. However, it was a welcome respite from the regularly scheduled stuff that seems to happen around here.
I made good progress on my Homes wall hanging. I have to put the little doors on all the houses.
I didn't do it at the cottage because the iron there doesn't heat up enough. I wanted to use fusible web to attach the doors. That is best done at home, where the iron is marginally better.
I saved the bits lefts over from the cutting charm squares to make the doors.
Then, just as I was about to decide which little house would go on which large square, I realized I forgot the post-it flags I normally use to label rows. This meant I would probably get it all messed up when it was time to put all the blocks together. I refused to go into town to get the silly post-it flags. Instead, I called in the technological marvel that is my camera.
I took a load of photos while I was auditioning the houses onto the blocks to make sure I had a clue where my thoughts were on my layout. It takes me forever to arrange blocks, and now I won't have start all over again. I am so glad I remembered to take that photo -- even if I did forget my helpful little flags.
While we were away, I tried a new  "company" dessert using summer berries. This version of tiramisu is amazing. It has little Maria cookies dipped in Tia Maria as the crust. Here's what you do:
Dip the cookies quickly, and then gently press them against the sides of a glass bowl or deep dish pie plate. Beat a 475 gram tub of Marscapone cheese with 1/2 cup of whipping cream. This takes about three minutes. It should be like whipped butter.  Refrigerate for at least two hours. Prepare the fruit mixture: 1/2 cup of hulled and halved strawberries and a half cup of blueberries, stirred together with 3 tbsp sugar. Cover and refrigerate.
This is berry good
At serving time, top the dish with the berries and juices. Serve. Take a few bows -- and try to blush attractively at the compliements.
I made this twice for company while we were away. It was elegant without too much work, and it was a perfect end of a summer meal.
While I was working on my wall hanging, one of my guests, a quilter who travels to a quilting meeting each week, admired my pin cushion for its petite and portable size. It is from last autumn's issue of Mollie Makes.
When I returned home, I made her a pear with some of my many pretty scraps. I found the lady bug at the dollar store. It is really a push pin, but I glued it into the pear as a decoration. I hope my friend likes her new pincushion, and that it travels well.
A single traveling pear
Now that I am home, and all my deadlines are met, I am hoping to work on some just-for-fun projects before I plow head long into the Christmas making.
One of them is a new Tilda doll. More on that very soon!

Saturday, June 30, 2012

Gone fishin'

Heyho, it's off to lake we go!
http://www.allpeoplequilt.com/images/slideshow/QAM-winter-11/QAM-CO-winter-11LG_ss8.jpg
Wall hanging ... WIP by the lake
We are heading off to our annual reading fest by the lake. The DH and I look like lumps on logs, parked by the lake from morning until evening, reading from our ebook libraries.
After dinner, we take a little boat cruise on the lake to watch the sun go down.
I know, it sounds like sloth disguised as a vacation. But honestly, it is my dream break.
I also bring a large hand sewing project with me. This is year, it it a wall hanging from Quilts and More Winter 2011.
I collected up numerous Sweet Water Homegrown fabrics, as well as some neutral backgrounds. This stuff is rarer than hens' teeth around here, so it took a while to find what I wanted. I found three packages of charm squares on sale at Quilt A Bag, and that was a tremendous help in getting the house appliques looking the way I wanted them to look. The background blocks are 10 inches square, so I had to improvise a bit.
Christmas in nearly July...
I did all the little house applique pieces yesterday. I do a cheater version of needle turn applique. Right sides together, I sew muslin to the piece, clip the curves and corners, make a slit in the muslin, and turn the shape right side out. Then, I just sit by the lake and stitch the applique to the blocks.
Hopefully, I will make such stunning progress, the wall hanging will be ready for its close up when I get back.

In the meantime, here is a photo of one of the projects I created for the Festive 2012 issue of A Needle Pulling Thread. The deadline for this issue was the end of June. I must admit, it was a challenge writing about festive gift giving as the temps here soared. I love the way these projects turned out, so I hope the readers do as well!
Catch ya later!

Sunday, June 17, 2012

Sew, pack and go!

Our friend Amanda is on holiday right now.
She took a really nice set of bags with her (if I do say myself, and I do).
Sandra and I did a zipper/tote bag set for Amanda's adventures.
We also entered it in the Purse Palozza challenge. Find out more about that here.
Sandra found the fabric for the set on a $2 a yard clearance table in the United States a while back. Amanda really liked the set, and is looking forward to looking stylish on her travels.
This pattern is from Sew Pretty Homestyle by Tone Finnanger.
The kanzashi flower is the "pointy" style, which is a bit of a departure for me. I usually do the rounded petal ones. I am getting better at folding them though. I have found that less pressing with the iron is the key for me.
Sandra's zippered pouches are, as ever, both useful and cute.
Well done to us, I say!